
The mere mention of the word "sanding" makes most woodworkers cringe at one time or another, as they envision hours of intense labor, preparing their projects for the finish.
But even though sanding may not be "a barrel-full of fun", any woodworker who's been at it for long knows full well that a good job of sanding will make the difference between a professional-looking project and one that you'd rather hide in a dark corner where no one will see it.
The terms "sanding" and "sandpaper" originated long ago, when ordinary sand or dust from bricks and stone where used to smooth and polish wood surfaces prior to finishing. In those days...long before the advent of modern abrasive materials and powered sanding machines...this was tedious work.
Today, powered sanding machines have eliminated most of that work and the most difficult part of the job is often deciding which type and grade of abrasives to use and which of the powered machines is best suited for the job at hand. Once you know the answers to these questions, you'll discover that twenty-first century sanding isn't as difficult as you may have imagined.
Where do you begin?
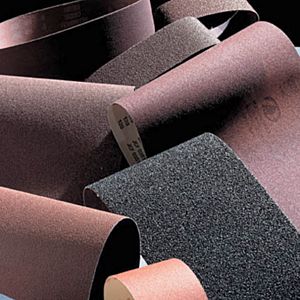
First, you need to familiarize yourself with the four most common types of abrasive materials available to the modern day woodworker: Flint, Garnet, Aluminum Oxide and Silicon Carbide.
FLINT is the least expensive - and least durable - of all abrasives. Made from crushed quartz, it's usually off-white in color. Because it's so inexpensive, it's best used for removing heavy layers of paint, wax or other finishes - or for sanding really resinous or "gummy" surfaces. When the abrasive "loads-up" with these clogging materials, just throw your sheet away and start with a fresh one. Since flint is really dull in comparison to other abrasives and has a tendency to leave flint dust embedded in the grain of the wood that can cause a chemical reaction with certain synthetic finishes, it is NOT recommended for any type of finish sanding.
ALUMINUM OXIDE is a synthetic abrasive, made from fusing bauxite in an electric furnace. It can be either red, brown, gray or black in color and offers very sharp grains that will out-wear Garnet abrasives.
For this reason, it is the preferred abrasive for most machine sanding operations and is clearly the most readily available of all abrasive materials.
GARNET is an excellent natural abrasive that will leave an extremely smooth finish. For this reason, professional furniture and cabinetmakers prefer it for final, finish sanding operations. Although it is not a very "hard" material, it is probably the sharpest of all abrasives, with particles that have a tendency to fracture during use. This fracturing process is constantly exposing sharp, new edges... and that's why it cuts so smoothly. Garnet paper is almost always reddish in color.
SILICON CARBIDE is the hardest and most expensive of all abrasive papers. It is a synthetic product, made by heating silica and carbon to form a crystalline substance that is almost as hard as a diamond and very brittle.
It's usually only available in fine to ultra-fine grades. For that reason, it is not well suited for sanding unfinished woods and is best reserved for wet or dry finish sanding of paints, varnishes, urethanes and lacquers. Charcoal colored silicon carbide paper is used for both wet or dry sanding, while light grey colored papers are for dry sanding only.
How are sandpapers graded?
There are three ways of grading abrasive papers: by name, such as coarse, medium fine, etc. - by grit numbers, such as 60, 80, 100, etc. - and by "aughts", such as 1/0, 4/0, 7/0, etc. The latter of these is not a common.
Although the names (coarse, etc.) are the easiest to understand, the ways manufacturers use these terms vary so much that they can be confusing. One manufacturer may call a 320-grit paper "very fine" while another may call it "extra fine".
Usually, papers will carry both a name and a grit number. Grit numbers range from 12 (extra-coarse) to 600 (extra-fine), while "aught" designations range from 4-1/2 (extra coarse) to 10/0 (extra-fine).
Grit numbers and "aught" designations are assigned by sifting abrasive particles through progressively smaller sieves, with the number of openings per linear inch determining the grit number. For example, 80-grit abrasive particles are selected with sieves having 80 openings per linear inch.
Cloth or Paper Backing?
The primary differences between cloth and paper backings lie in the areas of durability and flexibility. In addition, cloth backings are significantly more expensive than paper backings.
Cloth backings are available in two grades, labeled "X" and "J". Of the two, "X" backings are the stiffest and heaviest and are best for heavy machine sanding operations, such as belt sanders. "J" backings are lighter in weight and more flexible, and are therefore used for lighter-duty machine sanding (such as drum sanding) and hand-sanding operations, where flexible is important for reaching into contoured areas.

Paper backings come in five weights, ranging from "A" (the lightest) to "F" (the heaviest). Generally, the lighter weight papers are reserved for finer grits while heavier papers are more common with coarser grits. Paper backings are used primarily for hand sanding sheets, disc sanders, some drum sanders and orbiting sanders. For most applications, "C" or "D" weights (referred to as "cabinet papers") are best.
Open or closed coat?
With the exception of Flint, all abrasives are available in a choice of two coatings. Open Coat papers are made with their abrasive materials covering only 50% to 70% of the backing surface. Since the open areas between their abrasive particles will allow the dust and residue to fall out more easily with less "loading", they're best used for machine sanding operations or for sanding resinous or gummy materials.
All Shopsmith abrasives are Open Coat.
Closed Coat papers have a solid covering of abrasive materials. As a result, there is more cutting surface on the paper, resulting in a faster cutting action. However, Closed Coat papers will "load up" more quickly. For these reasons, Closed Coat papers are best reserved for hand sanding operations.
Hand or power sanding?
The simple answer to this question is almost always "both". Of course, there are always exceptions. For example, if you're building something other than fine furniture or cabinetry that won't require a fine, professional finish, power sanding alone will probably be sufficient. However, it's important to remember that it's virtually impossible to achieve a smooth, scratch-free surface on a top-quality piece of furniture or cabinetry without some hand sanding.
For this reason, it's best to use your power sander(s) to bring your workpieces to final dimension and smooth out any really rough areas first - then follow-up by going over any scratches left by your machines with a hand sanding block and progressively finer papers before applying your finish.
Which power sander is best?
There really isn't any "pat" answer, since each type of machine is designed for a particular job.
Belt Sanders are the fastest-cutting of the abrasive machines and are used primarily for bringing the stock to final dimension and removing deep blemishes from workpiece surfaces. They're available in both portable and stationary models with belt widths ranging from 3" to 36" and more for some heavy, industrial machines. When using a portable belt sander, let the weight of the machine do the work and NEVER apply excessive pressure. With stationary models, a limited amount of pressure may be required, depending on the weight of your workpiece. It's important to always keep the sander or the workpiece moving at all times - especially on veneered surfaces (such as plywoods). If you dwell, you could easily gouge the stock or sand through the veneered surface before you realize it. In addition, for the smoothest finish, always sand WITH the grain of the wood. If you're anxious to remove stock more quickly, sand diagonally or perpendicular to the grain first, then follow-up by sanding WITH the grain.
Disc Sanders are also available in portable or stationary models, although portable models are not recommended for woodworking because they can easily gouge the stock and are difficult to control.
When using a stationary disc sander, always sand on the "down" side of the disc and keep your stock moving. Again, dwells can cause unsightly gouges that could ruin your project. Standard disc sanders will remove stock quickly but are not recommended for finish sanding, since they will leave swirl marks.
However, Shopsmith's unique Conical Disc Sander is well suited for finish sanding, since it has been designed to leave a swirl-free finish.
Drum Sanders are used primarily for sanding inside and outside curves and profiles. Shopsmith offers a wide range of small and large diameters and can be used in the Drill Press mode or in a hand-held portable electric drill. The Shopsmith Oscillating Drum Sander moves up-and-down as it rotates, constantly exposing new abrasives as it moves for a smoother finish and less "loading" of the drum. Another unique drum sander is Shopsmith's inflatable or contour Drum Sander. It has been designed for use between Lathe Centers and is inflated with a bicycle pump prior to use. Inflating it to a low pressure allows the drum to conform to different contours...while inflating it to higher pressures is better for flatter surfaces.
Strip Sanders are a smaller version of a belt sander. Shopsmith's Strip Sander can be used with your choice of 1/2" or 1" wide sanding belts in a range of grits from 60 to 600 for coarse to fine sanding, grinding or sharpening. The Shopsmith model also comes with both a flat and convex back-up belt platen, plus a unique feature that permits its use for internal sanding of fine fretwork or cutouts.
Some Important Sanding Tips
• For the smoothest finish, always sand WITH the grain.
• To extend the usable life of your abrasive materials, clean them frequently with an abrasive cleaning stick or brush.
• Don't try to sand away glue or pencil marks. Glue should be scraped away and pencil marks should be erased.
• When hand sanding, use a sanding block with a felt pad whenever possible. An ordinary blackboard eraser makes a great sanding block
• For the best hand-sanding results, counting can help you achieve a uniform finish on all surfaces.
• Running a nylon stocking or cloth over a sanded surface will help you locate rough areas.
• Don't cut sandpaper with a knife or scissors - unless you're not planning to use the knife or scissors for anything else.
• Always turn sanding machines on before touching them to your workpiece.
• Keep all power sanding machines (or your workpieces) moving at all times to avoid dwells and gouges.
• Never skip from coarse to fine sandpapers.
• Follow all sanding operations with a tack cloth to remove dust particles prior to applying a finish.

Ted's Woodworking - Guide eBook
I have read your post. I am a regular reader of your post.I appreciate with you.Thanks for sharing the blog and always keep it
ReplyDeleteThanks for share helpful information.Belt sanders usually are mostly found in the original tough sanding method because they're able to eliminate tremendous amount regarding products speedily.
ReplyDeleteRegardless of the way that versatile or hand-held carpentry gear is in vogue nowadays, carpentry stationary machines have still not lost their utility quality. There are two periods of any carpentry venture. The primary stage is "forming" stage. In this stage, the wood pieces are cut and cut into the sought shape with the assistance of these carpentry stationary machines. Woodworker's machines
ReplyDeleteI read carefully from beginning to end post. A great article. It gives me more ideas
ReplyDeleteGreat article. This is helpful and informative for woodworkers. Thanks for sharing.
ReplyDelete